# AWS Production Deployment Checklist for Developers in 2026
> The complete AWS production deployment checklist for developers in 2026. Cover every step from code push to live app without missing a critical configuration.
- **Author**: arjun-mehta
- **Published**: 2026-06-12
- **Modified**: 2026-06-12
- **Category**: Deployment Guides
- **URL**: https://kuberns.com/blogs/aws-production-deployment-checklist/
---
Deploying to AWS gives you serious infrastructure. It also gives you a long list of things that must be configured correctly before your app is ready for real traffic.
Miss one step and you could be dealing with unsecured environment variables, a database accessible from the internet, no automated backups, or a CI/CD pipeline that deploys broken code to production without a safety net.
This checklist covers every step, in the right order, so nothing gets skipped.
## Prerequisites Before You Start
Get these in place before touching any AWS service. They prevent the most expensive mistakes.
### 1. Your Code Is in a GitHub Repository
Every managed deployment on AWS deploys from a Git source. Your codebase should be in a GitHub repository with a clean main branch that reflects the state you want to deploy.
```bash
git init
git add .
git commit -m "initial production build"
git remote add origin https://github.com/your-org/your-app.git
git push -u origin main
```
### 2. You Know Your Runtime and Build Commands
Before you configure any compute service on AWS, know exactly what your app needs:
- Build command (for example `npm run build` or `pip install -r requirements.txt`)
- Start command (for example `node dist/index.js` or `gunicorn app:app`)
- Runtime version (Node 20, Python 3.11, etc.)
- Port your app listens on
### 3. You Have All Environment Variables Listed
Make a complete list of every environment variable your app reads at runtime. This includes database URLs, API keys, auth secrets, and third-party service credentials. You will store these in AWS Secrets Manager, not in your code.
```
DATABASE_URL=
SECRET_KEY=
STRIPE_SECRET_KEY=
NODE_ENV=production
PORT=
```
## The AWS Production Deployment Checklist
Work through these steps in order. Each one builds on the previous.
---
### Step 1: AWS Account and IAM Setup
This is the security foundation. Do not skip or rush it.
**Create your AWS account**
Go to [aws.amazon.com](https://aws.amazon.com) and create an account. Enable MFA on your root account immediately after creation. The root account should not be used for day-to-day operations.
**Create IAM users and roles**
Create a dedicated IAM user for deployments with only the permissions required for your specific workload. Avoid `AdministratorAccess` on service accounts. Use least-privilege policies.
```json
{
"Version": "2012-10-17",
"Statement": [
{
"Effect": "Allow",
"Action": [
"ec2:DescribeInstances",
"ecs:RegisterTaskDefinition",
"ecs:UpdateService"
],
"Resource": "*"
}
]
}
```
**Enable AWS CloudTrail**
CloudTrail logs every API call in your account. Enable it in your primary region before any other configuration. It is the audit trail you need when something goes wrong.
---
### Step 2: Choose Your Compute Service
The right compute service depends on your workload and how much infrastructure management you are willing to own.
| Service | Best For | Management Overhead |
|---|---|---|
| EC2 | Full control, custom configurations | High |
| Elastic Beanstalk | Single apps, quick setup | Medium |
| ECS with Fargate | Containerised apps, no cluster to manage | Low to Medium |
| EKS | Complex microservices, Kubernetes teams | Very High |
| Lambda | Short-lived functions, event-driven code | Low (with limits) |
For most web apps and APIs, **ECS with Fargate** gives you containerised deployment without managing EC2 instances or Kubernetes clusters.
---
### Step 3: VPC and Networking
Every production workload needs a proper VPC setup. The default AWS VPC is not suitable for production because everything is public by default.
**Create a VPC with public and private subnets**
```
VPC CIDR: 10.0.0.0/16
Public subnets (for load balancer):
- 10.0.1.0/24 (us-east-1a)
- 10.0.2.0/24 (us-east-1b)
Private subnets (for app and database):
- 10.0.3.0/24 (us-east-1a)
- 10.0.4.0/24 (us-east-1b)
```
Your application servers and database should live in private subnets. Only your load balancer sits in the public subnet.
**Configure security groups**
Create separate security groups for each layer:
- **Load balancer SG:** Allow inbound 80 and 443 from `0.0.0.0/0`
- **App SG:** Allow inbound on your app port only from the load balancer SG
- **Database SG:** Allow inbound on the database port only from the app SG
Never open port 5432 or 3306 directly to the internet.
**Set up a NAT Gateway**
Your app in a private subnet needs outbound internet access to pull dependencies and call external APIs. A NAT Gateway in each public subnet handles this without exposing your app to inbound traffic.
---
### Step 4: Environment Variables and Secrets
Never commit secrets to your Git repository. Use AWS Secrets Manager or Parameter Store.
**AWS Secrets Manager** is the right choice for database credentials, API keys, and auth secrets that rotate.
```bash
aws secretsmanager create-secret \
--name prod/myapp/database \
--secret-string '{"DATABASE_URL":"postgresql://user:pass@host:5432/db"}'
```
**AWS Parameter Store** works for non-sensitive configuration values and is cheaper for simple string parameters.
```bash
aws ssm put-parameter \
--name /prod/myapp/NODE_ENV \
--value "production" \
--type String
```
Grant your ECS task role or EC2 instance role read access to only the secrets your app actually needs. No wildcards.
---
### Step 5: Database Setup
For most apps, Amazon RDS is the right managed database choice. It handles backups, patching, and failover automatically.
**Provision RDS in a private subnet**
Create your RDS instance inside the private subnet group you configured in Step 3. It should never have a public IP address.
**Enable automated backups**
Set the backup retention period to at least 7 days. Enable point-in-time recovery. For production databases handling real user data, 30-day retention is a reasonable minimum.
**Enable Multi-AZ for production**
Multi-AZ creates a synchronous standby replica in a different availability zone. If the primary fails, AWS promotes the standby automatically with minimal downtime. It is not optional for production.
**Set connection pooling**
Direct connections from your app to RDS become a bottleneck at scale. Use PgBouncer for PostgreSQL or configure your ORM's connection pool properly.
```python
# Example: SQLAlchemy connection pool settings
engine = create_engine(
DATABASE_URL,
pool_size=10,
max_overflow=20,
pool_pre_ping=True
)
```
---
### Step 6: Application Load Balancer
Your load balancer is the entry point for all traffic. It handles SSL termination, routes requests to your app instances, and runs health checks that remove unhealthy instances from rotation.
**Create an Application Load Balancer**
Place the ALB in your public subnets. Attach the load balancer security group you created in Step 3.
**Create a target group**
Register your app instances or ECS services as targets. Set the health check path to an endpoint your app responds to with a 200 status, such as `/health` or `/`.
**Configure health check settings**
```
Health check protocol: HTTP
Health check path: /health
Healthy threshold: 2
Unhealthy threshold: 3
Timeout: 5 seconds
Interval: 30 seconds
```
An instance is only added to rotation after passing the healthy threshold. If it fails the unhealthy threshold, the ALB stops sending it traffic.
---
### Step 7: SSL Certificate and Custom Domain
**Request a certificate in AWS Certificate Manager**
Go to ACM and request a public certificate for your domain. Use DNS validation so the certificate renews automatically without any manual steps.
```
Domain: yourdomain.com
Additional names: www.yourdomain.com, api.yourdomain.com
Validation method: DNS
```
Add the CNAME records ACM provides to your DNS provider. Validation completes in minutes.
**Configure HTTPS on the load balancer**
Add an HTTPS listener on port 443 and attach your ACM certificate. Add an HTTP listener on port 80 that redirects all traffic to HTTPS.
```
Listener 1: HTTP:80 → Redirect to HTTPS
Listener 2: HTTPS:443 → Forward to target group
```
**Configure Route 53**
Create an A record with an Alias target pointing to your ALB DNS name. Route 53 handles DNS propagation and latency-based routing if you are deploying across multiple regions.
---
### Step 8: CI/CD Pipeline
Manual deploys to production are a reliability risk. Every production deployment should go through an automated pipeline.
**GitHub Actions for ECS deployments**
```yaml
name: Deploy to Production
on:
push:
branches: [main]
jobs:
deploy:
runs-on: ubuntu-latest
steps:
- uses: actions/checkout@v4
- name: Configure AWS credentials
uses: aws-actions/configure-aws-credentials@v4
with:
aws-access-key-id: ${{ secrets.AWS_ACCESS_KEY_ID }}
aws-secret-access-key: ${{ secrets.AWS_SECRET_ACCESS_KEY }}
aws-region: us-east-1
- name: Login to Amazon ECR
id: login-ecr
uses: aws-actions/amazon-ecr-login@v2
- name: Build and push Docker image
run: |
docker build -t $ECR_REGISTRY/$ECR_REPOSITORY:$IMAGE_TAG .
docker push $ECR_REGISTRY/$ECR_REPOSITORY:$IMAGE_TAG
- name: Update ECS service
run: |
aws ecs update-service \
--cluster prod-cluster \
--service myapp-service \
--force-new-deployment
```
**Key pipeline requirements for production:**
- Run tests before every deploy. A failing test should block the deployment automatically.
- Build and push a Docker image to Amazon ECR on each push to main.
- Use image tags (commit SHA, not `latest`) so you can roll back to a specific build.
- Set up deployment notifications to Slack or email so your team knows when a deploy succeeds or fails.
---
### Step 9: Autoscaling
Your app should handle traffic spikes without manual intervention.
**ECS Service Auto Scaling**
Configure Application Auto Scaling to adjust the number of ECS tasks based on CPU utilisation or request count.
```bash
aws application-autoscaling register-scalable-target \
--service-namespace ecs \
--resource-id service/prod-cluster/myapp-service \
--scalable-dimension ecs:service:DesiredCount \
--min-capacity 2 \
--max-capacity 10
```
**Set scale-out and scale-in policies**
Scale out when CPU stays above 70% for 2 consecutive minutes. Scale in when CPU drops below 30% for 10 minutes. The asymmetric timing prevents flapping during brief traffic spikes.
**Set a minimum of 2 tasks**
A single running task is a single point of failure. Always run at least 2 tasks in production so a failed instance does not take your app offline while a replacement starts.
---
### Step 10: Monitoring and Logging
You cannot fix what you cannot see. Get monitoring in place before your app goes live, not after the first incident.
**Configure CloudWatch Log Groups**
Every container or instance should stream logs to CloudWatch. Set log retention to 30 days minimum for production.
```json
{
"logConfiguration": {
"logDriver": "awslogs",
"options": {
"awslogs-group": "/ecs/myapp",
"awslogs-region": "us-east-1",
"awslogs-stream-prefix": "ecs"
}
}
}
```
**Set CloudWatch Alarms for the metrics that matter**
Create alarms for each of these and route them to an SNS topic that emails or pages your team:
| Metric | Threshold | Action |
|---|---|---|
| CPU Utilisation | Above 80% for 5 min | Alert + scale out |
| Memory Utilisation | Above 80% for 5 min | Alert |
| ALB 5xx Error Rate | Above 1% for 2 min | Alert immediately |
| RDS CPU | Above 80% for 5 min | Alert |
| RDS FreeStorageSpace | Below 5 GB | Alert immediately |
| ALB TargetResponseTime | P99 above 2 seconds | Alert |
**Enable AWS X-Ray for distributed tracing**
If your app makes calls to other services, databases, or external APIs, X-Ray traces those calls end to end. It is the difference between knowing an endpoint is slow and knowing exactly which downstream call is causing it.
---
### Step 11: Add Your Custom Domain
Go to your DNS provider and create a CNAME or Alias record pointing to your ALB DNS name. If you are using Route 53, create an A record with Alias targeting your load balancer.
Once DNS propagates, your app is reachable on your custom domain with HTTPS on every request. ACM renews the certificate automatically before it expires.
---
## Why Most Teams Stop Managing AWS Directly
This checklist works. Engineers at funded startups follow it every time. It also takes the better part of a day to complete, requires familiarity with IAM, VPC, ECS, ACM, Route 53, and CloudWatch, and creates ongoing maintenance responsibility for every layer you configure.
Every security group rule, every scaling policy, every IAM role, every log retention setting is something your team now owns and must update when it changes.
That is the real cost of raw AWS: not the infrastructure bill, but the engineering time spent configuring and maintaining infrastructure instead of building product.
 ## Deploy to AWS Production Without the Manual Setup: Use Kuberns
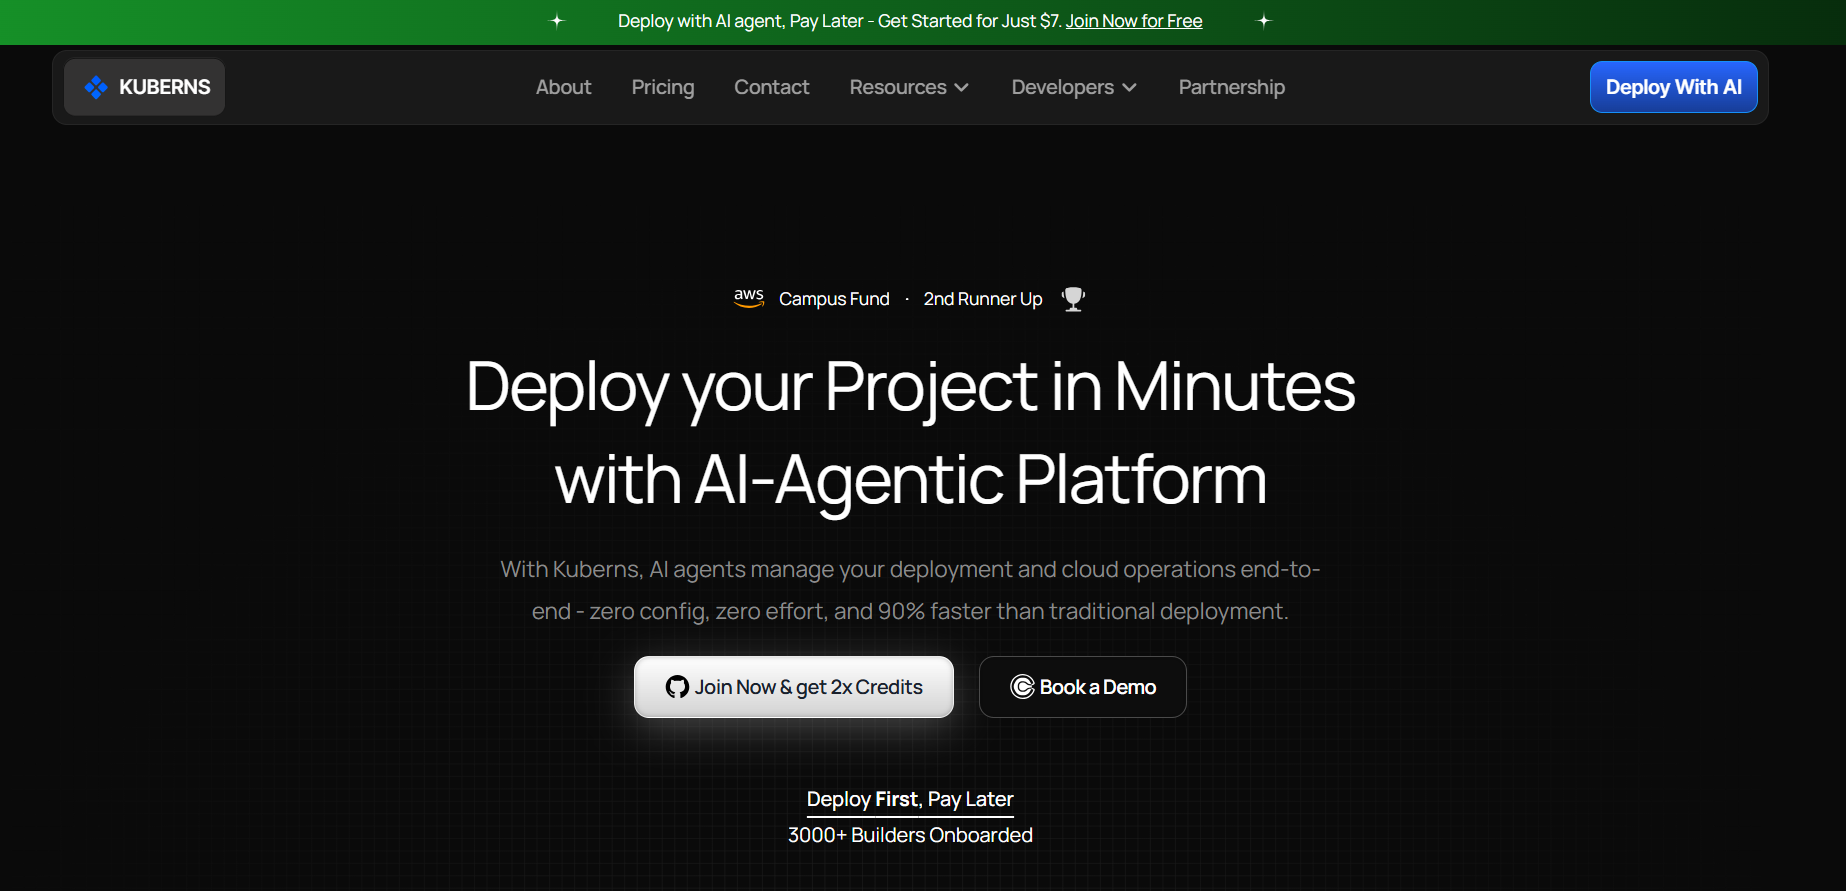
[Kuberns](https://kuberns.com) is built on AWS infrastructure. When you deploy on Kuberns, your app runs on AWS with every item on this checklist handled automatically by the Agentic AI.
No VPC configuration. No security group rules. No IAM policies to write. No CloudWatch alarms to set manually. No certificate to provision. No CI/CD YAML to maintain.
Here is how it works:
### Step 1: Sign Up on Kuberns

Go to [dashboard.kuberns.com](https://dashboard.kuberns.com) and create a free account. Free credits cover approximately 30 days of running a full-stack app with no credit card required.
Click **New Project** to begin.
### Step 2: Connect Your GitHub Repository

Select GitHub as your source and authorise Kuberns to access your repositories. Choose your repo and select the branch you want to deploy.
The Agentic AI scans your project immediately. It detects your framework, runtime version, build command, and start command automatically. No form to fill in.
### Step 3: Add Your Environment Variables

Add your environment variables in the Environment tab before deploying. Kuberns encrypts every value and injects them securely at runtime. No Secrets Manager to configure, no Parameter Store policies to write.
If your app needs a managed PostgreSQL database, provision one directly from the Kuberns dashboard. The `DATABASE_URL` is injected automatically.
### Step 4: Click Deploy
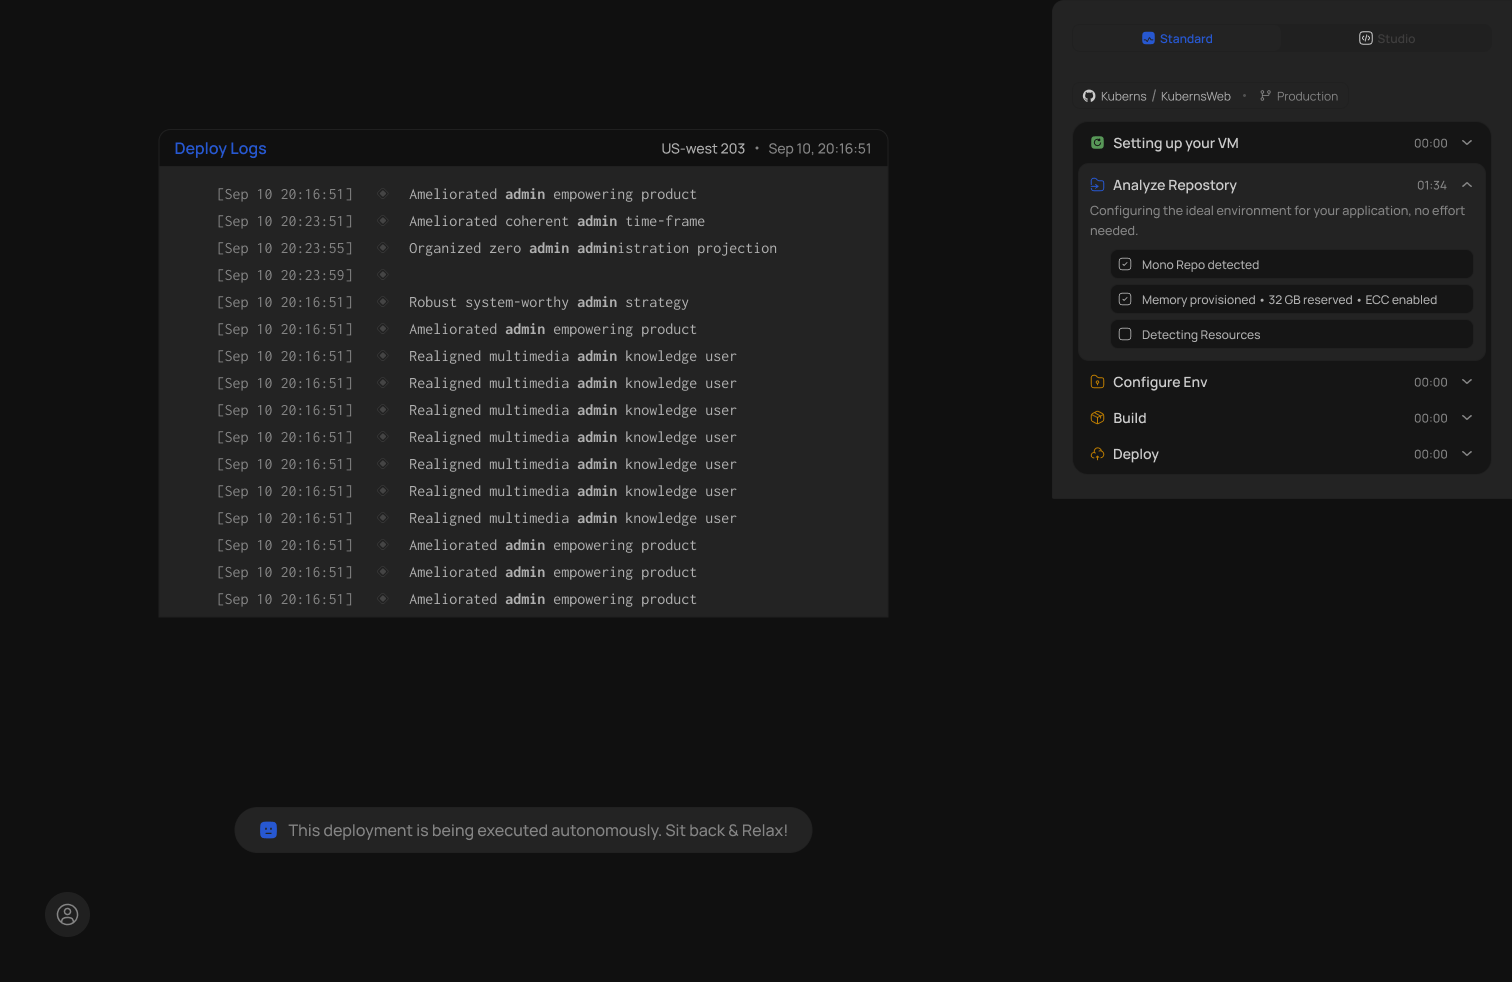
Click **Deploy**. The Agentic AI takes over:
- Installs dependencies and runs your build command
- Containerises your app and deploys to AWS infrastructure
- Provisions an SSL certificate and assigns a live HTTPS URL
- Configures autoscaling based on real traffic
- Sets up monitoring, logging, and alerting automatically
- Wires CI/CD so every future push to your branch triggers an automatic redeploy
### Step 5: Your App is Live on AWS
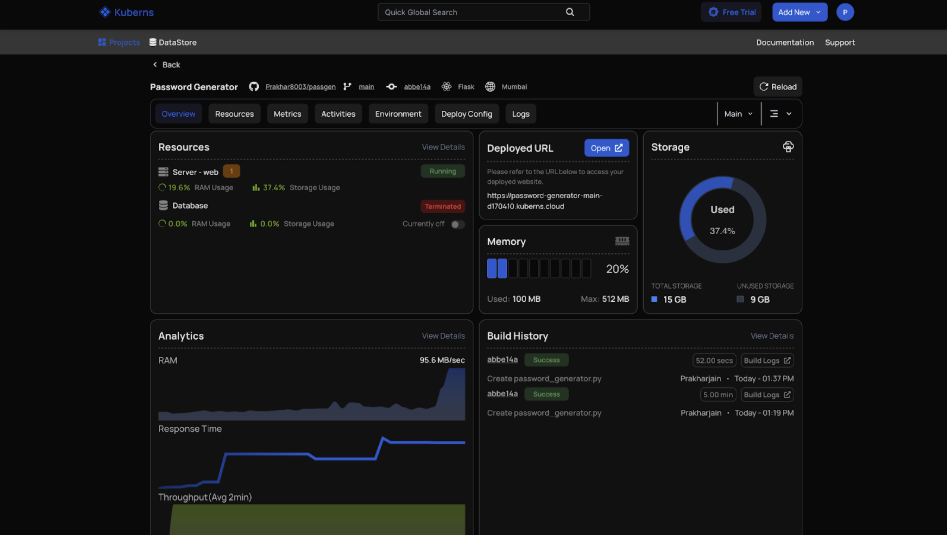
Your app is running on AWS in production. SSL is active. Autoscaling is on. Logs are streaming. CI/CD is configured.
### Step 6: Add Your Custom Domain
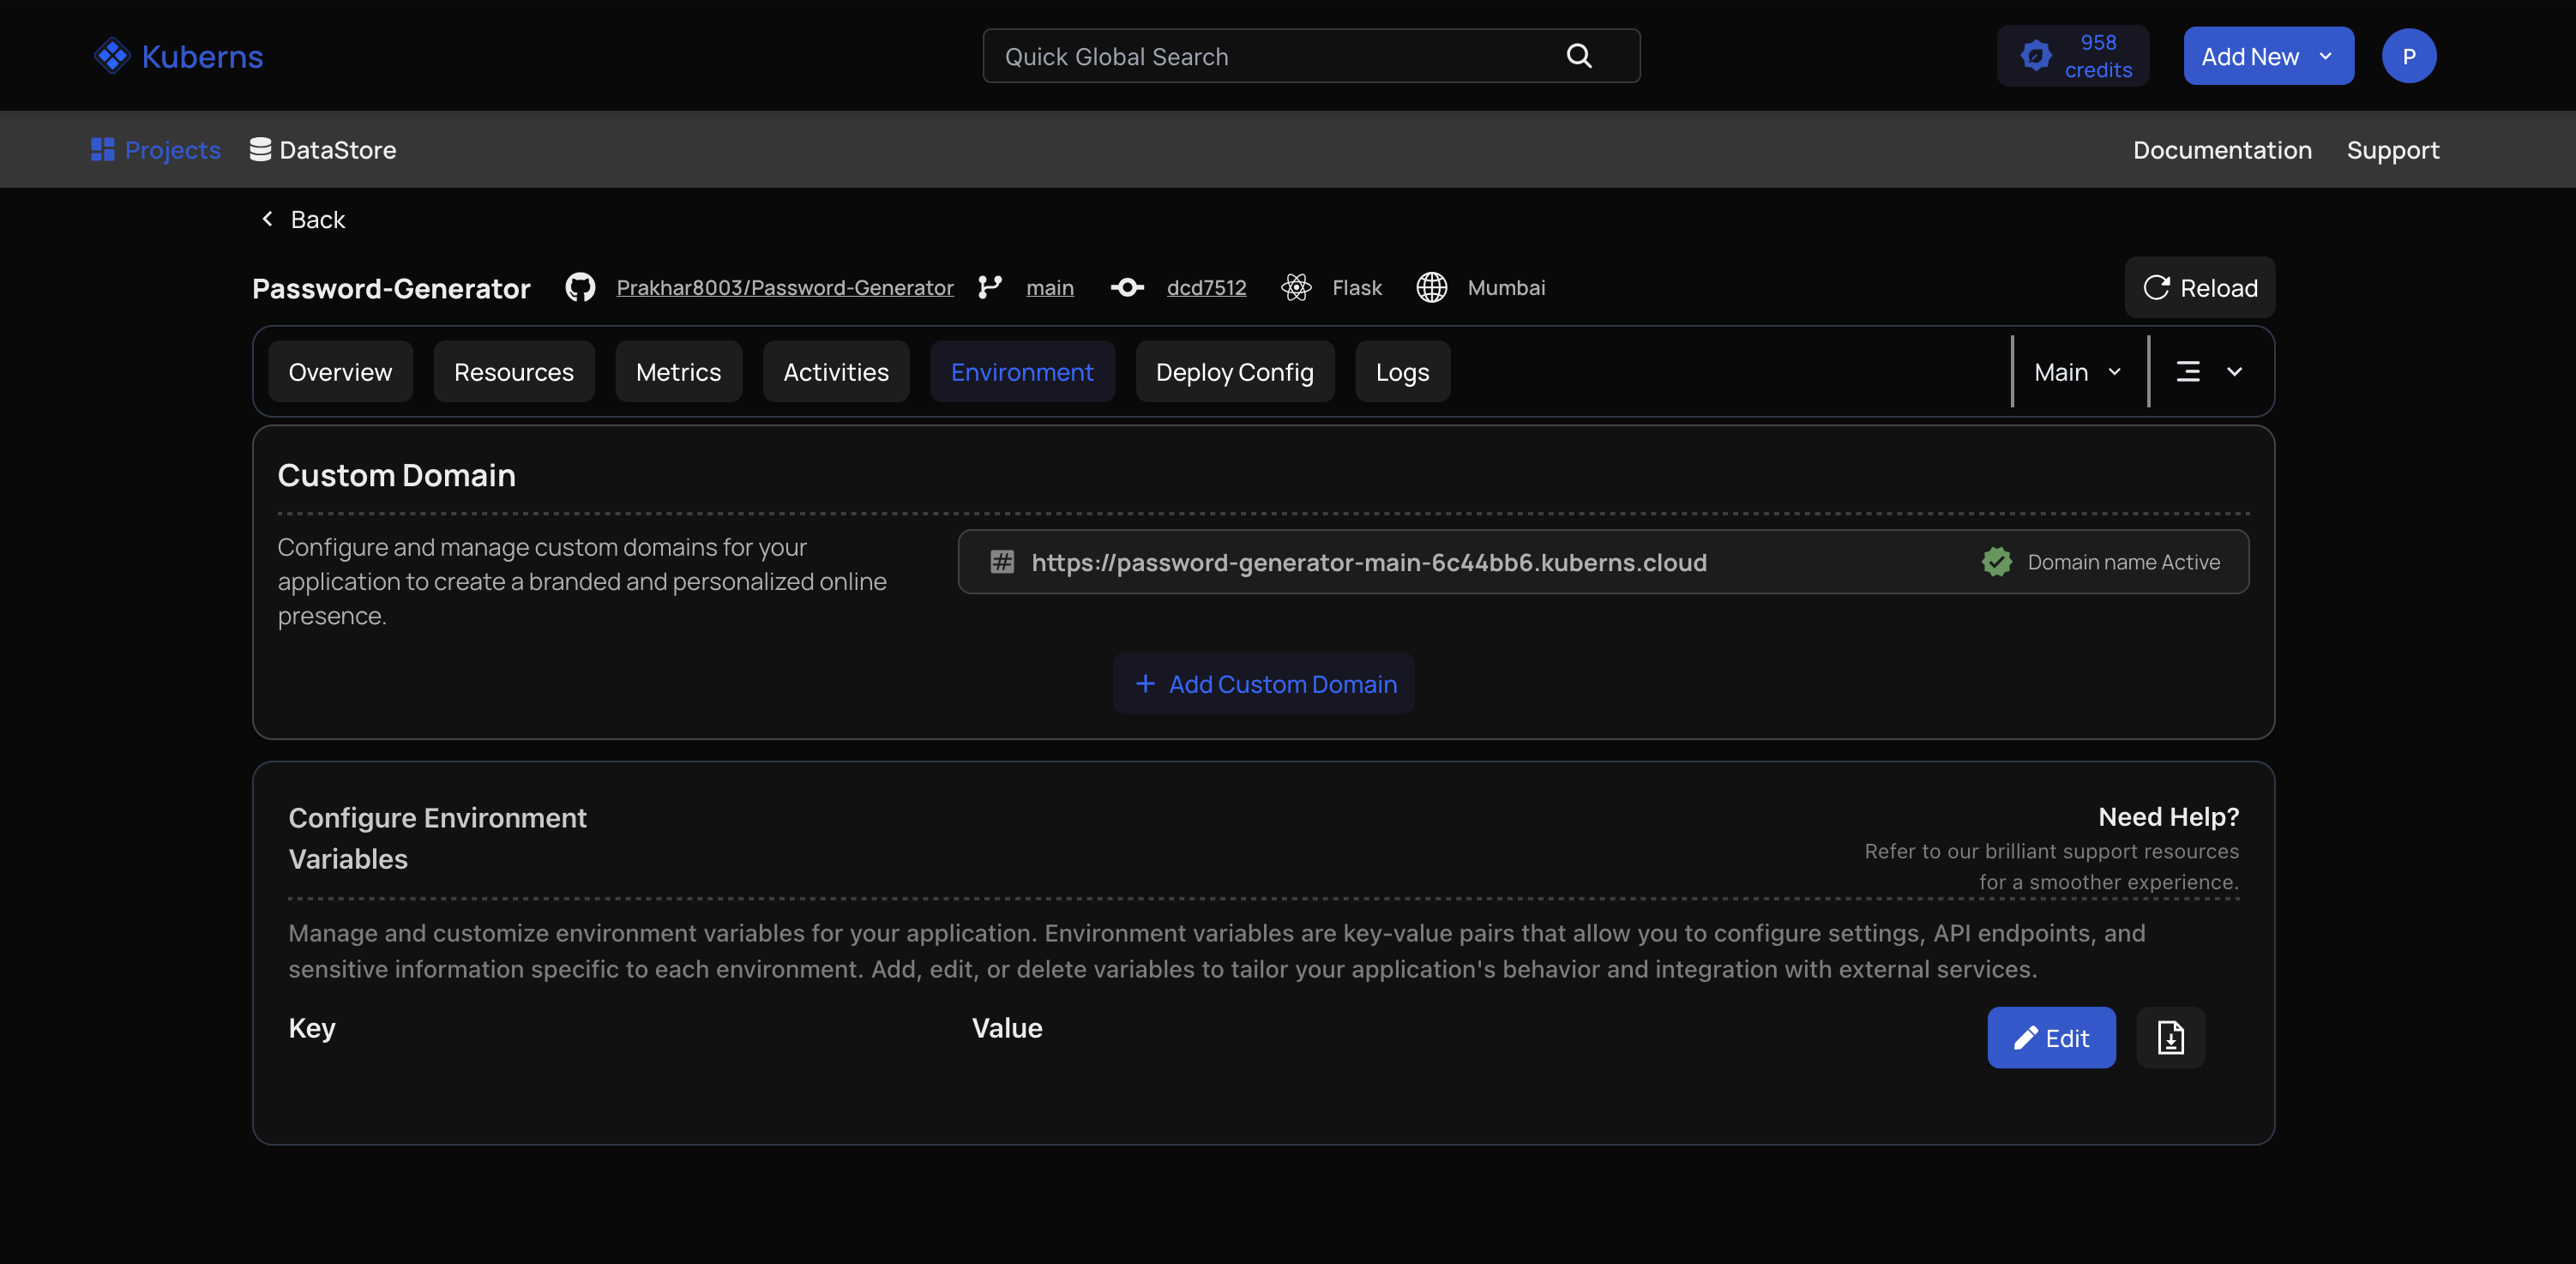
Go to the **Domains** section of your Kuberns project and enter your custom domain. Kuberns generates the DNS records to add at your registrar. Once DNS propagates, your app is live on your own domain with HTTPS on every request.
---
## AWS Manual Setup vs Kuberns: What the Checklist Actually Costs
| What AWS Requires Manually | What Kuberns Does Automatically |
|---|---|
| VPC, subnets, security groups | Configured automatically |
| IAM roles and policies | Managed by Kuberns |
| SSL certificate via ACM | Provisioned and auto-renewed |
| Route 53 DNS configuration | One-step domain connect |
| CloudWatch alarms and log groups | Set up on deploy |
| ECS task definitions and services | AI handles all container config |
| CI/CD pipeline YAML | Auto-configured on repo connect |
| Autoscaling policies | Active from first deploy |
| Database setup and backups | Managed databases with one click |
| Setup time | Under 5 minutes |
Both options run your app on AWS. One requires a full day and ongoing DevOps maintenance. The other takes five minutes.
[Start deploying on Kuberns](https://dashboard.kuberns.com) and skip the checklist entirely.
## Deploy to AWS Production Without the Manual Setup: Use Kuberns

[Kuberns](https://kuberns.com) is built on AWS infrastructure. When you deploy on Kuberns, your app runs on AWS with every item on this checklist handled automatically by the Agentic AI.
No VPC configuration. No security group rules. No IAM policies to write. No CloudWatch alarms to set manually. No certificate to provision. No CI/CD YAML to maintain.
Here is how it works:
### Step 1: Sign Up on Kuberns

Go to [dashboard.kuberns.com](https://dashboard.kuberns.com) and create a free account. Free credits cover approximately 30 days of running a full-stack app with no credit card required.
Click **New Project** to begin.
### Step 2: Connect Your GitHub Repository

Select GitHub as your source and authorise Kuberns to access your repositories. Choose your repo and select the branch you want to deploy.
The Agentic AI scans your project immediately. It detects your framework, runtime version, build command, and start command automatically. No form to fill in.
### Step 3: Add Your Environment Variables

Add your environment variables in the Environment tab before deploying. Kuberns encrypts every value and injects them securely at runtime. No Secrets Manager to configure, no Parameter Store policies to write.
If your app needs a managed PostgreSQL database, provision one directly from the Kuberns dashboard. The `DATABASE_URL` is injected automatically.
### Step 4: Click Deploy

Click **Deploy**. The Agentic AI takes over:
- Installs dependencies and runs your build command
- Containerises your app and deploys to AWS infrastructure
- Provisions an SSL certificate and assigns a live HTTPS URL
- Configures autoscaling based on real traffic
- Sets up monitoring, logging, and alerting automatically
- Wires CI/CD so every future push to your branch triggers an automatic redeploy
### Step 5: Your App is Live on AWS

Your app is running on AWS in production. SSL is active. Autoscaling is on. Logs are streaming. CI/CD is configured.
### Step 6: Add Your Custom Domain

Go to the **Domains** section of your Kuberns project and enter your custom domain. Kuberns generates the DNS records to add at your registrar. Once DNS propagates, your app is live on your own domain with HTTPS on every request.
---
## AWS Manual Setup vs Kuberns: What the Checklist Actually Costs
| What AWS Requires Manually | What Kuberns Does Automatically |
|---|---|
| VPC, subnets, security groups | Configured automatically |
| IAM roles and policies | Managed by Kuberns |
| SSL certificate via ACM | Provisioned and auto-renewed |
| Route 53 DNS configuration | One-step domain connect |
| CloudWatch alarms and log groups | Set up on deploy |
| ECS task definitions and services | AI handles all container config |
| CI/CD pipeline YAML | Auto-configured on repo connect |
| Autoscaling policies | Active from first deploy |
| Database setup and backups | Managed databases with one click |
| Setup time | Under 5 minutes |
Both options run your app on AWS. One requires a full day and ongoing DevOps maintenance. The other takes five minutes.
[Start deploying on Kuberns](https://dashboard.kuberns.com) and skip the checklist entirely.
 ## Frequently Asked Questions
**What should I check before deploying to AWS production?**
Before deploying to AWS production, confirm your IAM roles follow least-privilege, your secrets are stored in Secrets Manager rather than committed to your repository, your database is in a private subnet, SSL is configured on your load balancer, automated backups are enabled, and CloudWatch alarms are active for CPU, memory, error rate, and database storage.
**How do I deploy a Node.js app to AWS production?**
Containerise your Node.js app, push the image to Amazon ECR, create an ECS task definition pointing to that image, create an ECS service with a minimum of 2 tasks behind an Application Load Balancer, configure autoscaling, and add a CloudWatch log group. Alternatively, connect your GitHub repo to Kuberns and deploy to AWS in under 5 minutes with no container or ECS configuration required.
**What is the difference between ECS and EKS for production?**
ECS is AWS's managed container orchestration service. EKS runs Kubernetes on AWS. ECS is significantly simpler to set up and operate for teams that are not already invested in Kubernetes. EKS is the right choice when you need Kubernetes-native tooling, custom operators, or have existing Helm charts and cluster configuration to migrate. For most web apps and APIs, ECS with Fargate is the better starting point.
**How do I secure environment variables on AWS?**
Store all secrets in AWS Secrets Manager or Parameter Store. Never commit API keys, database credentials, or auth secrets to your Git repository. Grant your ECS task role or EC2 instance role read access to only the specific secrets your app needs. Rotate credentials regularly and audit access via CloudTrail.
**What AWS services are required for a production deployment?**
A standard production deployment on AWS uses EC2 or ECS for compute, RDS for a managed database, an Application Load Balancer for traffic routing and SSL termination, AWS Certificate Manager for your SSL certificate, Route 53 for DNS, CloudWatch for monitoring and logging, Secrets Manager for credentials, and IAM for access control.
**Can I deploy to AWS without configuring any of this manually?**
Yes. Kuberns runs on AWS infrastructure and handles all of this automatically. Connect your GitHub repo, add environment variables, and click Deploy. The Agentic AI configures networking, SSL, autoscaling, monitoring, CI/CD, and the database layer. Your app is live on AWS in under 5 minutes.
---
- [More Deployment Guides articles](https://kuberns.com/blogs/category/deployment-guides/1/)
- [All articles](https://kuberns.com/blogs/)
## Frequently Asked Questions
**What should I check before deploying to AWS production?**
Before deploying to AWS production, confirm your IAM roles follow least-privilege, your secrets are stored in Secrets Manager rather than committed to your repository, your database is in a private subnet, SSL is configured on your load balancer, automated backups are enabled, and CloudWatch alarms are active for CPU, memory, error rate, and database storage.
**How do I deploy a Node.js app to AWS production?**
Containerise your Node.js app, push the image to Amazon ECR, create an ECS task definition pointing to that image, create an ECS service with a minimum of 2 tasks behind an Application Load Balancer, configure autoscaling, and add a CloudWatch log group. Alternatively, connect your GitHub repo to Kuberns and deploy to AWS in under 5 minutes with no container or ECS configuration required.
**What is the difference between ECS and EKS for production?**
ECS is AWS's managed container orchestration service. EKS runs Kubernetes on AWS. ECS is significantly simpler to set up and operate for teams that are not already invested in Kubernetes. EKS is the right choice when you need Kubernetes-native tooling, custom operators, or have existing Helm charts and cluster configuration to migrate. For most web apps and APIs, ECS with Fargate is the better starting point.
**How do I secure environment variables on AWS?**
Store all secrets in AWS Secrets Manager or Parameter Store. Never commit API keys, database credentials, or auth secrets to your Git repository. Grant your ECS task role or EC2 instance role read access to only the specific secrets your app needs. Rotate credentials regularly and audit access via CloudTrail.
**What AWS services are required for a production deployment?**
A standard production deployment on AWS uses EC2 or ECS for compute, RDS for a managed database, an Application Load Balancer for traffic routing and SSL termination, AWS Certificate Manager for your SSL certificate, Route 53 for DNS, CloudWatch for monitoring and logging, Secrets Manager for credentials, and IAM for access control.
**Can I deploy to AWS without configuring any of this manually?**
Yes. Kuberns runs on AWS infrastructure and handles all of this automatically. Connect your GitHub repo, add environment variables, and click Deploy. The Agentic AI configures networking, SSL, autoscaling, monitoring, CI/CD, and the database layer. Your app is live on AWS in under 5 minutes.
---
- [More Deployment Guides articles](https://kuberns.com/blogs/category/deployment-guides/1/)
- [All articles](https://kuberns.com/blogs/)