# How to Deploy a Node.js App on Heroku in 2026
> Learn how to deploy a Node.js app on Heroku in 2026 with this step-by-step guide. Plus, discover a faster alternative that skips the CLI entirely.
- **Author**: emily-carter
- **Published**: 2026-05-01
- **Modified**: 2026-05-01
- **Category**: Deployment Guides
- **URL**: https://kuberns.com/blogs/heroku-nodejs-deploy/
---
You finished your Node.js app. It runs fine on localhost. Now you want it live and accessible to anyone with a link.
Heroku has been the default answer for this for years. It is still a working option in 2026, but it is not the same platform it was when it had a free tier. Before you commit to it, it helps to understand exactly what the setup involves, where it tends to break, and what it actually costs.
This guide walks you through the full Heroku deploy process for a Node.js app, step by step. At the end, there is a section on a faster path if the Heroku setup feels like more overhead than your project needs.
## What You Need Before You Start
Before running a single command, make sure you have these in place:
- **Node.js and npm installed** on your machine (run `node -v` to confirm)
- **A Heroku account**: create one at heroku.com. Note: you will need a paid plan to keep your app awake
- **Heroku CLI installed**: download from the Heroku Dev Center for your OS
- **A package.json in your project root** with a `start` script defined under `scripts`
- **A Git repository**: Heroku deploys via git push, so your project needs to be a git repo
If your `package.json` does not have a start script yet, add one:
```json
"scripts": {
"start": "node index.js"
}
```
> *If you are comparing where to deploy before committing to Heroku, [the best Heroku alternatives for developers in 2026](https://kuberns.com/blogs/the-ultimate-guide-to-heroku-alternatives-in-2025/) covers the full landscape with honest trade-offs.*
## How to Deploy a Node.js App on Heroku
### Step 1: Prepare Your App for Heroku
Three things need to be in place before your first push goes through cleanly.
**Pin your Node.js version**
Add an `engines` field to your `package.json`. This tells Heroku exactly which Node version to use and prevents unexpected behavior from version mismatches:
```json
"engines": {
"node": "22.x"
}
```
**Create a Procfile**
A Procfile is a plain text file (no extension) in your project root. It tells Heroku how to start your app:
```
web: node index.js
```
If your entry file is named something other than `index.js`, update accordingly.
**Use `process.env.PORT` for your port**
Heroku assigns a dynamic port at runtime. If you hardcode a port like `3000`, your app will crash on deploy. Update your server to use:
```js
const PORT = process.env.PORT || 3000;
app.listen(PORT, () => {
console.log(`Server running on port ${PORT}`);
});
```
### Step 2: Create and Connect Your Heroku App
Log into Heroku via the CLI:
```bash
heroku login
```
This opens a browser window to authenticate. Once done, come back to your terminal.
Create your app:
```bash
heroku create your-app-name
```
Replace `your-app-name` with something unique. If you skip the name, Heroku generates a random one. This command also automatically adds a `heroku` git remote to your local repo.
Confirm the remote was added:
```bash
git remote -v
```
You should see a `heroku` remote pointing to `https://git.heroku.com/your-app-name.git`.
### Step 3: Set Environment Variables
Never hardcode API keys, database URLs, or secrets in your code. Heroku provides config vars for this:
```bash
heroku config:set NODE_ENV=production
heroku config:set API_KEY=your-actual-key
heroku config:set DATABASE_URL=your-database-connection-string
```
To view all set variables:
```bash
heroku config
```
In your app code, access these with `process.env.VARIABLE_NAME` exactly as you would with a `.env` file locally.
### Step 4: Deploy via Git Push
Stage and commit your changes if you have not already:
```bash
git add .
git commit -m "Prepare for Heroku deploy"
```
Push to Heroku:
```bash
git push heroku main
```
If your default branch is `master`, use that instead. The terminal will show the build log in real time. A successful deploy ends with a line like:
```
remote: Verifying deploy... done.
```
Open your live app:
```bash
heroku open
```
To stream logs and verify everything is running correctly:
```bash
heroku logs --tail
```
### Step 5: Add a Database (Optional)
If your Node.js app needs a PostgreSQL database, Heroku has a managed add-on:
```bash
heroku addons:create heroku-postgresql:mini
```
This provisions a database and automatically sets a `DATABASE_URL` config var on your app. In your Node.js code, connect using that variable:
```js
const { Pool } = require('pg');
const pool = new Pool({
connectionString: process.env.DATABASE_URL,
ssl: { rejectUnauthorized: false }
});
```
The `mini` plan is the lowest-cost option. Check Heroku's add-on pricing page for current rates before provisioning.
> *For teams deploying a Node.js backend alongside a frontend, [how to deploy a full-stack app with AI from a single GitHub push](https://kuberns.com/blogs/deploy-full-stack-app-with-ai/) covers the full-stack workflow in one place.*
 ## Common Heroku Errors and Why They Push Developers Away

Heroku errors tend to show up right after your first successful deploy, which makes them especially frustrating. Here is what you will most likely hit and what each one signals.
### H10: App Crashed
This is Heroku's catch-all error for a process that exited unexpectedly. Common causes include a missing or wrong start script in `package.json`, a dependency that is not listed in `package.json` (works locally because it is already in `node_modules`, fails on Heroku because that folder is not committed), or a crash in your startup code before the server starts listening.
To debug, run `heroku logs --tail` immediately after the crash. The actual error is almost always a few lines above the H10 line.
The bigger point here: debugging a crashed dyno means reading logs in a terminal, cross-referencing config vars, and pushing fixes through git just to test a one-line change. That feedback loop gets slow fast. If you find yourself going through it repeatedly, it may be worth looking at a platform that gives you faster feedback and less manual config.
### Port Binding Issues
Heroku dynamically assigns a port via `process.env.PORT`. If your app listens on a hardcoded port instead, Heroku cannot route traffic to it and the dyno shuts down with an R11 error. This is a fixable one-liner, but it is also the kind of thing Heroku never surfaces upfront, which means most developers hit it on their first deploy.
### Module Not Found
This happens when a package your code depends on is missing from `package.json`. Locally it worked fine because the package was already in `node_modules`. On Heroku, only what is declared in `package.json` gets installed.
Fix: run `npm install package-name` which updates `package.json` automatically, rather than manually editing the file.
Each of these errors requires a new git commit and push just to test a fix. On a platform you are paying for, that friction compounds quickly. If you want a deploy workflow without these pain points, skip to the last section.
> *If you have already decided Heroku is not the right fit, [the top Heroku competitors and what makes each one different](https://kuberns.com/blogs/heroku-hosting-explained/) breaks down the alternatives worth considering.*
## The Catch: Heroku Pricing in 2026
Heroku removed its free tier in November 2022. Here is what current pricing actually means for a Node.js app:
- **Eco dynos** cost around $5 per month but sleep after 30 minutes of inactivity. Your app takes 20 to 30 seconds to wake on the next request. For anything you want to share with a client or demo to users, that cold start is a bad first impression.
- **Basic dynos** at around $7 per month stay awake but give you a single instance with no autoscaling and no built-in metrics.
- **Standard dynos** start at $25 per month for a proper always-on setup with horizontal scaling.
Add-ons cost extra on top of that. PostgreSQL starts at a few dollars a month. You are also still managing buildpacks, Procfiles, dyno types, and config vars manually regardless of which tier you are on.
You are paying for a platform that still requires a meaningful amount of manual configuration just to get a Node.js app running reliably.
> *For a direct cost comparison between Heroku and its closest alternatives, [Heroku vs Render vs Kuberns](https://kuberns.com/blogs/heroku-vs-render-vs-kuberns/) puts the pricing and feature differences side by side.*
## The Best and Fastest Way to Deploy a Node.js App in 2026
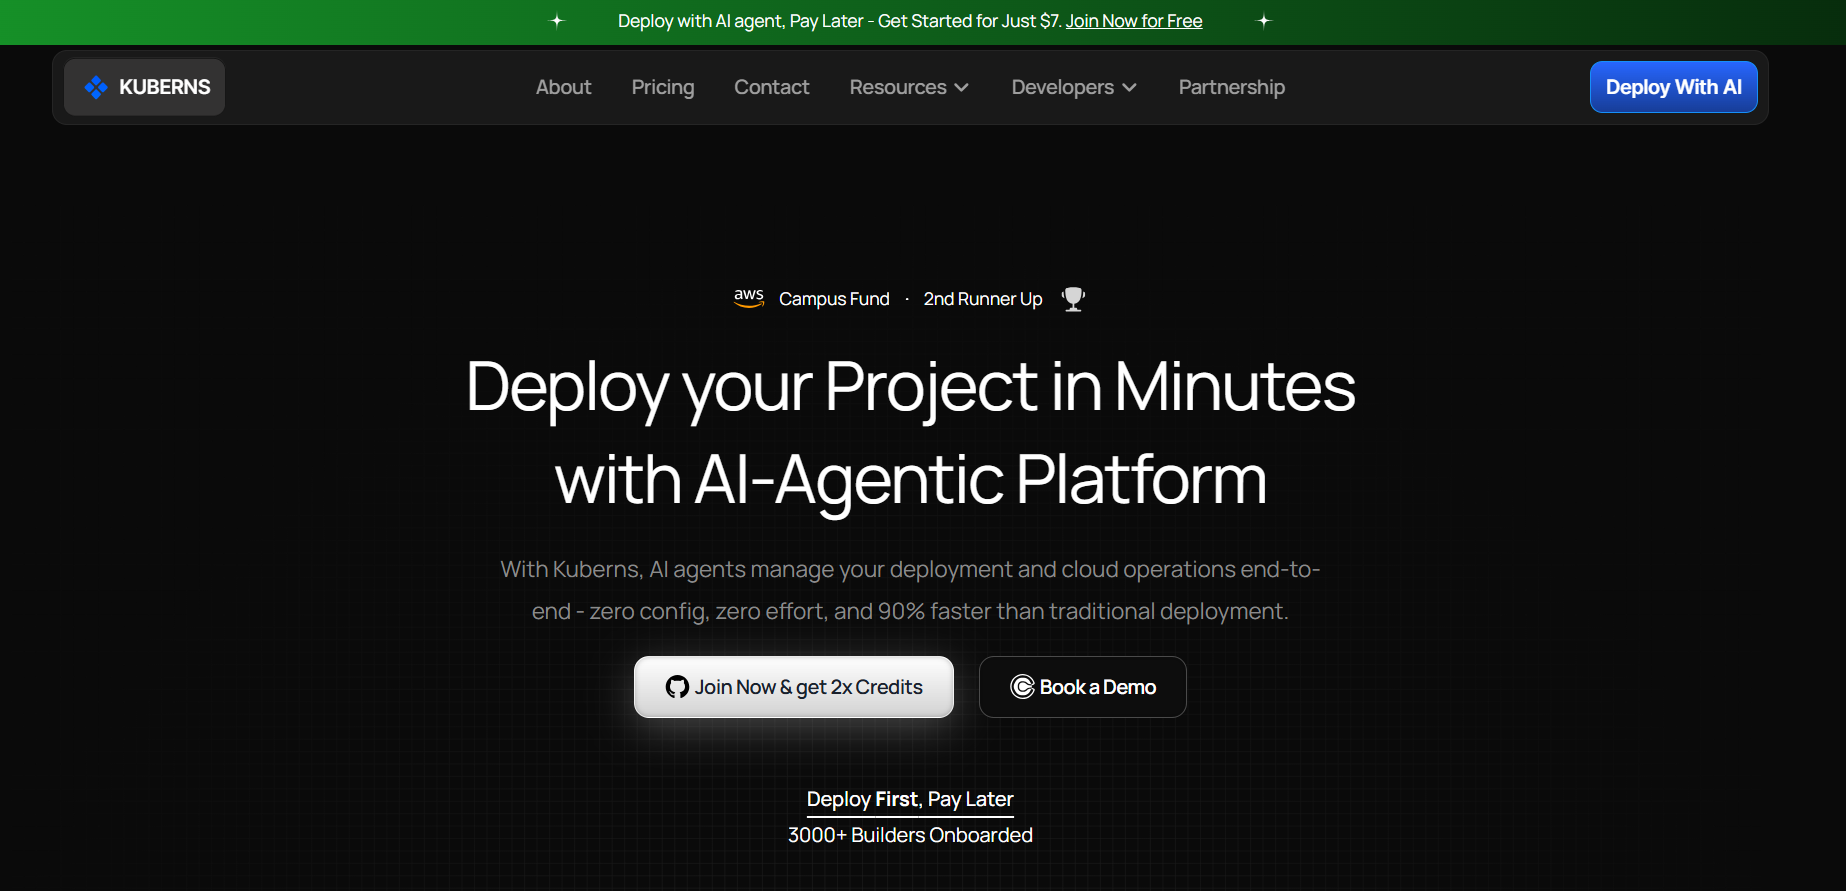
If what you actually want is your Node.js app live, stable, and accessible without spending half a day on config, [Kuberns](https://kuberns.com) is the answer.
Kuberns is an agentic AI deployment platform built on AWS. It reads your repository, detects your stack, configures your environment, and gets your app live in minutes. No Procfile. No CLI setup. No dyno types to manage.
### What Makes Kuberns Different
Here is what the AI agent handles automatically:
- **Stack detection**: Kuberns reads your `package.json` and identifies your Node.js version, framework, and dependencies without any manual input
- **Zero config deploy**: no Procfile, no buildpack selection, no port configuration. The AI figures out how to start your app
- **Automatic database provisioning**: need PostgreSQL or MySQL? Kuberns provisions it and injects the connection string as an environment variable
- **SSL and custom domain**: HTTPS is on by default. Point your domain and it handles the certificate
- **Always-on, no sleeping**: your app stays up. No cold starts, no 30-second wake times on the cheapest plan
- **One-click rollbacks**: if a deploy breaks something, roll back to the previous version from the dashboard in one click
- **Live logs and monitoring**: everything you would get from `heroku logs --tail`, but in a dashboard with no terminal required
- **Up to 40% cheaper than direct AWS**, with $14 in free credits to start
### How to Deploy Your Node.js App on Kuberns
**Step 1: Connect your GitHub repo**
Sign up at [dashboard.kuberns.com](https://dashboard.kuberns.com), connect your GitHub account, and select the repository with your Node.js app.
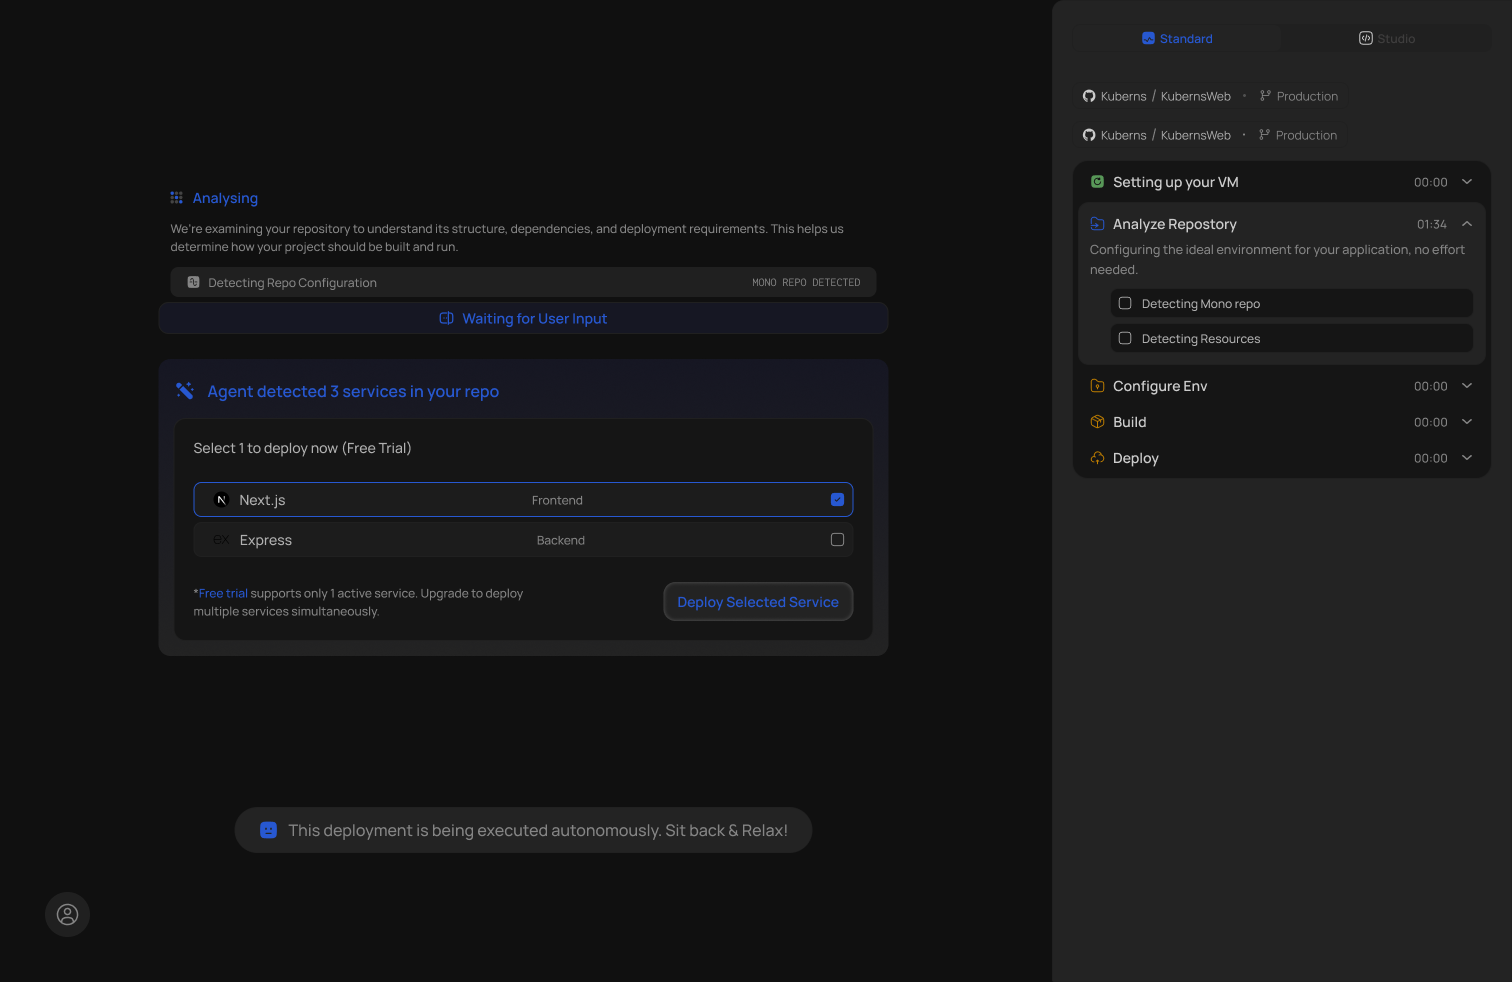
**Step 2: Let the AI scan your app**
Kuberns AI reads your project structure, detects Node.js, identifies your entry point and dependencies, and sets up the build and run configuration automatically.
**Step 3: Review or skip**
You can review what the AI configured before deploying, or just hit deploy and let it handle everything. Either way takes under a minute.
**Step 4: Hit deploy**
Kuberns builds your app, provisions infrastructure on AWS, and gives you a live HTTPS URL. The whole process takes under five minutes on a fresh project.
**Step 5: Add extras from the dashboard**
Custom domain, environment variables, database, scaling rules all managed from a clean dashboard without touching a terminal.
> *To see how Kuberns compares to other platforms on auto-deployment from GitHub, [how to auto-deploy your apps from GitHub in one click](https://kuberns.com/blogs/how-to-auto-deploy-your-apps-from-github-in-one-click/) walks through the exact workflow.*
## Conclusion
Deploying a Node.js app on Heroku in 2026 still works. The process is straightforward once you have the Procfile set up, the port configured correctly, and your dependencies in order. The CLI-based workflow gives you full control and the platform is mature and well-documented.
The trade-off is that Heroku asks you to manage a fair amount of configuration manually, charges at least $5 to $7 a month for a dyno that still sleeps, and creates friction every time something breaks in production.
If your goal is to get your Node.js app live fast and keep it running without the overhead, Kuberns handles all of that automatically. Connect your repo, let the AI set up your environment, and deploy in minutes. You can also check how this compares to the standard [Node.js deployment guide](https://kuberns.com/blogs/how-to-deploy-nodejs-app/) or explore the full list of [Heroku alternatives in 2026](https://kuberns.com/blogs/the-ultimate-guide-to-heroku-alternatives-in-2025/) if you are evaluating other platforms.
## Frequently Asked Questions
### Is Heroku free for Node.js in 2026?
No. Heroku retired its free tier in November 2022. You need at least a paid plan to keep a Node.js app running without it sleeping.
### How long does Heroku take to deploy a Node.js app?
A typical first deploy takes 2 to 5 minutes depending on your dependency tree. Subsequent deploys are faster if the build cache is warm.
### What is a Procfile in Heroku?
A Procfile is a plain text file in your project root that tells Heroku how to start your app. For a Node.js app it usually contains: `web: node index.js`
### Does Heroku support Node.js 22?
Yes. You can pin your Node.js version in `package.json` under the `engines` field. Setting `engines.node` to `22.x` will use the latest Node 22 release on Heroku.
### What is the fastest way to deploy a Node.js app in 2026?
Connecting your GitHub repo to Kuberns and letting the AI agent detect your stack, configure the environment, and deploy automatically. No Procfile, no CLI, no dyno management needed.
---
- [More Deployment Guides articles](https://kuberns.com/blogs/category/deployment-guides/1/)
- [All articles](https://kuberns.com/blogs/)
## Common Heroku Errors and Why They Push Developers Away

Heroku errors tend to show up right after your first successful deploy, which makes them especially frustrating. Here is what you will most likely hit and what each one signals.
### H10: App Crashed
This is Heroku's catch-all error for a process that exited unexpectedly. Common causes include a missing or wrong start script in `package.json`, a dependency that is not listed in `package.json` (works locally because it is already in `node_modules`, fails on Heroku because that folder is not committed), or a crash in your startup code before the server starts listening.
To debug, run `heroku logs --tail` immediately after the crash. The actual error is almost always a few lines above the H10 line.
The bigger point here: debugging a crashed dyno means reading logs in a terminal, cross-referencing config vars, and pushing fixes through git just to test a one-line change. That feedback loop gets slow fast. If you find yourself going through it repeatedly, it may be worth looking at a platform that gives you faster feedback and less manual config.
### Port Binding Issues
Heroku dynamically assigns a port via `process.env.PORT`. If your app listens on a hardcoded port instead, Heroku cannot route traffic to it and the dyno shuts down with an R11 error. This is a fixable one-liner, but it is also the kind of thing Heroku never surfaces upfront, which means most developers hit it on their first deploy.
### Module Not Found
This happens when a package your code depends on is missing from `package.json`. Locally it worked fine because the package was already in `node_modules`. On Heroku, only what is declared in `package.json` gets installed.
Fix: run `npm install package-name` which updates `package.json` automatically, rather than manually editing the file.
Each of these errors requires a new git commit and push just to test a fix. On a platform you are paying for, that friction compounds quickly. If you want a deploy workflow without these pain points, skip to the last section.
> *If you have already decided Heroku is not the right fit, [the top Heroku competitors and what makes each one different](https://kuberns.com/blogs/heroku-hosting-explained/) breaks down the alternatives worth considering.*
## The Catch: Heroku Pricing in 2026
Heroku removed its free tier in November 2022. Here is what current pricing actually means for a Node.js app:
- **Eco dynos** cost around $5 per month but sleep after 30 minutes of inactivity. Your app takes 20 to 30 seconds to wake on the next request. For anything you want to share with a client or demo to users, that cold start is a bad first impression.
- **Basic dynos** at around $7 per month stay awake but give you a single instance with no autoscaling and no built-in metrics.
- **Standard dynos** start at $25 per month for a proper always-on setup with horizontal scaling.
Add-ons cost extra on top of that. PostgreSQL starts at a few dollars a month. You are also still managing buildpacks, Procfiles, dyno types, and config vars manually regardless of which tier you are on.
You are paying for a platform that still requires a meaningful amount of manual configuration just to get a Node.js app running reliably.
> *For a direct cost comparison between Heroku and its closest alternatives, [Heroku vs Render vs Kuberns](https://kuberns.com/blogs/heroku-vs-render-vs-kuberns/) puts the pricing and feature differences side by side.*
## The Best and Fastest Way to Deploy a Node.js App in 2026

If what you actually want is your Node.js app live, stable, and accessible without spending half a day on config, [Kuberns](https://kuberns.com) is the answer.
Kuberns is an agentic AI deployment platform built on AWS. It reads your repository, detects your stack, configures your environment, and gets your app live in minutes. No Procfile. No CLI setup. No dyno types to manage.
### What Makes Kuberns Different
Here is what the AI agent handles automatically:
- **Stack detection**: Kuberns reads your `package.json` and identifies your Node.js version, framework, and dependencies without any manual input
- **Zero config deploy**: no Procfile, no buildpack selection, no port configuration. The AI figures out how to start your app
- **Automatic database provisioning**: need PostgreSQL or MySQL? Kuberns provisions it and injects the connection string as an environment variable
- **SSL and custom domain**: HTTPS is on by default. Point your domain and it handles the certificate
- **Always-on, no sleeping**: your app stays up. No cold starts, no 30-second wake times on the cheapest plan
- **One-click rollbacks**: if a deploy breaks something, roll back to the previous version from the dashboard in one click
- **Live logs and monitoring**: everything you would get from `heroku logs --tail`, but in a dashboard with no terminal required
- **Up to 40% cheaper than direct AWS**, with $14 in free credits to start
### How to Deploy Your Node.js App on Kuberns

**Step 1: Connect your GitHub repo**
Sign up at [dashboard.kuberns.com](https://dashboard.kuberns.com), connect your GitHub account, and select the repository with your Node.js app.
**Step 2: Let the AI scan your app**
Kuberns AI reads your project structure, detects Node.js, identifies your entry point and dependencies, and sets up the build and run configuration automatically.
**Step 3: Review or skip**
You can review what the AI configured before deploying, or just hit deploy and let it handle everything. Either way takes under a minute.
**Step 4: Hit deploy**
Kuberns builds your app, provisions infrastructure on AWS, and gives you a live HTTPS URL. The whole process takes under five minutes on a fresh project.
**Step 5: Add extras from the dashboard**
Custom domain, environment variables, database, scaling rules all managed from a clean dashboard without touching a terminal.
> *To see how Kuberns compares to other platforms on auto-deployment from GitHub, [how to auto-deploy your apps from GitHub in one click](https://kuberns.com/blogs/how-to-auto-deploy-your-apps-from-github-in-one-click/) walks through the exact workflow.*
## Conclusion
Deploying a Node.js app on Heroku in 2026 still works. The process is straightforward once you have the Procfile set up, the port configured correctly, and your dependencies in order. The CLI-based workflow gives you full control and the platform is mature and well-documented.
The trade-off is that Heroku asks you to manage a fair amount of configuration manually, charges at least $5 to $7 a month for a dyno that still sleeps, and creates friction every time something breaks in production.
If your goal is to get your Node.js app live fast and keep it running without the overhead, Kuberns handles all of that automatically. Connect your repo, let the AI set up your environment, and deploy in minutes. You can also check how this compares to the standard [Node.js deployment guide](https://kuberns.com/blogs/how-to-deploy-nodejs-app/) or explore the full list of [Heroku alternatives in 2026](https://kuberns.com/blogs/the-ultimate-guide-to-heroku-alternatives-in-2025/) if you are evaluating other platforms.
## Frequently Asked Questions
### Is Heroku free for Node.js in 2026?
No. Heroku retired its free tier in November 2022. You need at least a paid plan to keep a Node.js app running without it sleeping.
### How long does Heroku take to deploy a Node.js app?
A typical first deploy takes 2 to 5 minutes depending on your dependency tree. Subsequent deploys are faster if the build cache is warm.
### What is a Procfile in Heroku?
A Procfile is a plain text file in your project root that tells Heroku how to start your app. For a Node.js app it usually contains: `web: node index.js`
### Does Heroku support Node.js 22?
Yes. You can pin your Node.js version in `package.json` under the `engines` field. Setting `engines.node` to `22.x` will use the latest Node 22 release on Heroku.
### What is the fastest way to deploy a Node.js app in 2026?
Connecting your GitHub repo to Kuberns and letting the AI agent detect your stack, configure the environment, and deploy automatically. No Procfile, no CLI, no dyno management needed.
---
- [More Deployment Guides articles](https://kuberns.com/blogs/category/deployment-guides/1/)
- [All articles](https://kuberns.com/blogs/)