Published
- 12 min read
How to Deploy a Spring Boot Application in 2025
Deploying a Spring Boot application is not as straightforward as writing it. You need to manage JDK versions, build tools, server configuration, databases, and environment variables.
Each cloud platform behaves differently, which often makes the first production deployment feel slow and confusing.
In 2025, most teams follow one of three deployment paths.
The first is the traditional virtual machine method, where you manually configure the server.
The second uses a container-based workflow, so the app runs consistently everywhere.
The third is an automated one-click deployment method used by modern teams, where the platform handles build, runtime setup, and scaling for you.
If you want a clear understanding of how automated deployment works behind the scenes, you can read our detailed guide on what Kuberns is and how it simplifies building and deploying full-stack apps.
In this article, you will learn all three deployment methods, the pros and cons of each, and the exact steps you can follow to deploy your Spring Boot application smoothly in production.
What you need before deployment
Before deploying your Spring Boot application, ensure that a few essentials are in place. These ensure that your build runs smoothly and your app behaves correctly in production.
• A supported Java runtime such as Java 17 or Java 21, since most modern Spring Boot apps are optimised for these versions.
• A build tool like Maven or Gradle, because your deployment workflow depends on how you package your JAR or container image.
• A complete Spring Boot project with the correct folder structure, build configuration, and packaged dependencies.
• A database connection URL or credentials if your application connects to MySQL, PostgreSQL, MongoDB, or any external data source.
• A hosting environment such as a virtual machine, container-based platform, or an automated deployment service that can run your app reliably.
Having these ready removes most deployment errors and helps you move from development to production with fewer surprises.
If you are exploring better platforms, you can check our guide on the best auto-deployment tools developers are using in 2025.
Method 1: Deploy Spring Boot on a Virtual Machine
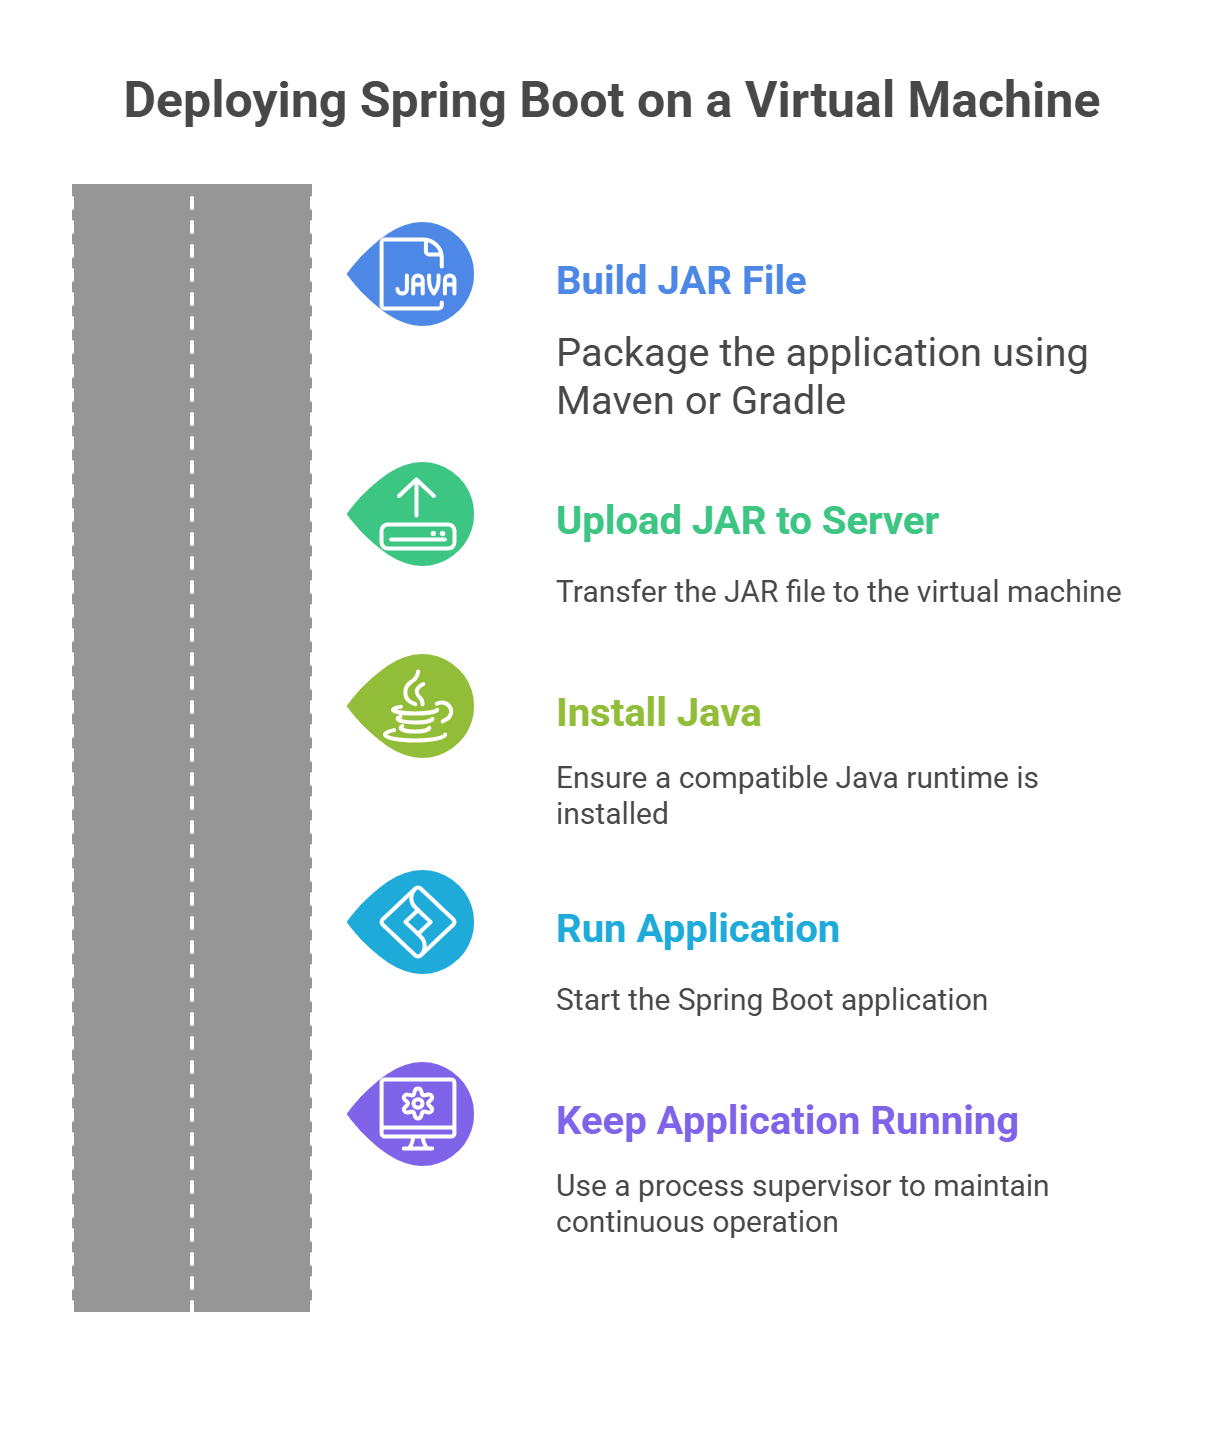 Deploying your Spring Boot application on a virtual machine is the most traditional approach. It gives you full control over the operating system, runtime, security, and resource allocation.
The downside is that you need to configure and maintain everything manually, which can take more time and effort compared to automated platforms.
Step 1. Build your JAR file
Your first step is to package the application. If you are using Maven, you generate the JAR with the command mvn clean package. If you are using Gradle, the build command is ./gradlew build.
After the build completes, the compiled JAR file appears in the target or build directory of your project.
Step 2. Upload the JAR to your server
Next, transfer the JAR file to your virtual machine. You can use SSH-based tools like SCP or GUI tools such as FileZilla.
The goal is simply to move your packaged application into the server environment where it will run.
Step 3. Install Java on the server
Your VM must have a compatible Java runtime installed for the Spring Boot app to run. On Ubuntu, you install Java by updating the package list and then installing the OpenJDK package.
This ensures the runtime version matches what you used during development.
Step 4. Run your Spring Boot application
Once Java is installed and the JAR file is in place, you start the application with a simple java -jar command. Spring Boot starts an embedded server, usually on port 8080, so you can immediately access the application through your server’s IP and port.
Step 5. Keep the application running in the background
Running the app manually works for testing, but it stops as soon as your SSH session closes. You need a process supervisor to keep it running continuously. Tools like systemd or screen help with this. A systemd service file contains sections for describing the application, defining the user account, setting the command that starts the app, and ensuring it launches automatically on server restart.
This turns your Spring Boot app into a long-running background service.
Method 2: Deploy Spring Boot with Docker
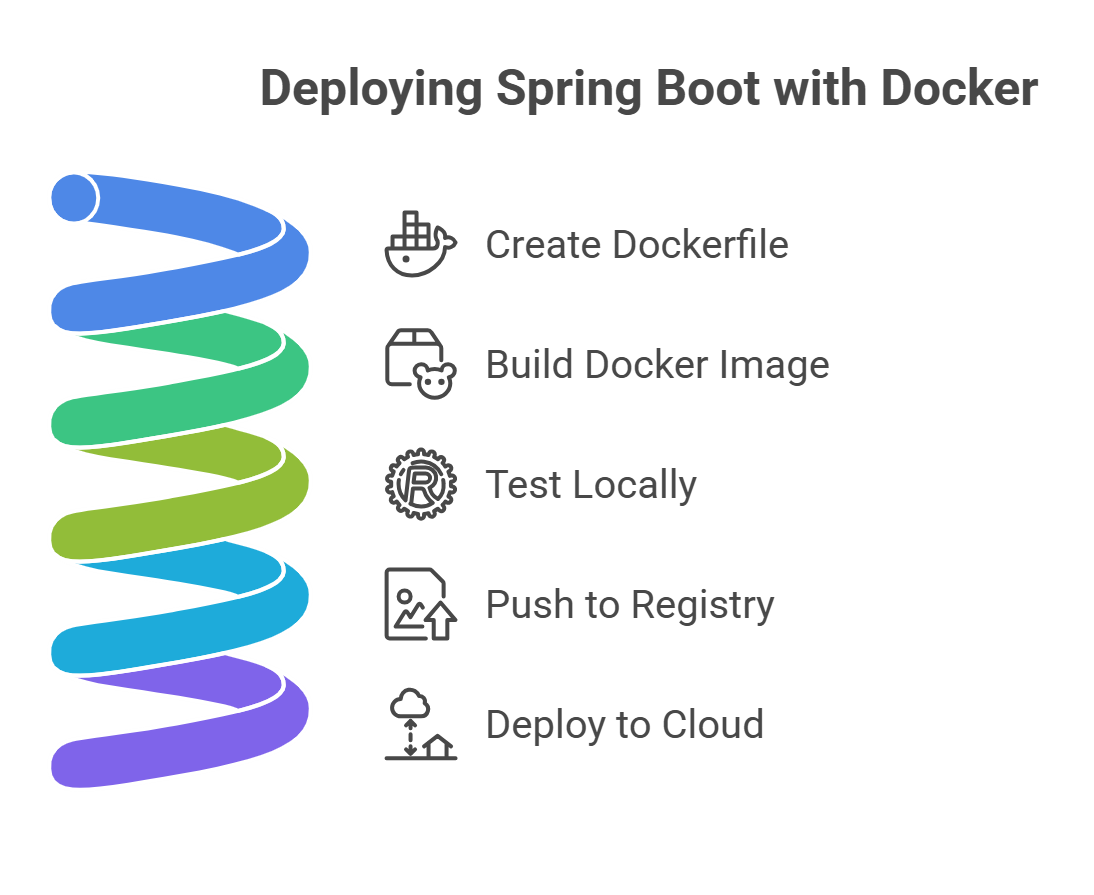 Docker is one of the most reliable ways to deploy a Spring Boot application because it gives you a consistent environment regardless of where you run your app. Instead of configuring servers manually, you package everything into a container so the app behaves the same in development, staging, and production.
Step 1. Create a Dockerfile
Start by adding a Dockerfile to your project. A typical Dockerfile uses an official Java runtime image such as Eclipse Temurin, sets a working directory, copies your JAR file into the container, exposes port 8080, and defines how the application should start. This keeps your build repeatable and lightweight.
Step 2. Build the Docker image
Once the Dockerfile is ready, you create an image from it. This image becomes the portable version of your application that can run anywhere a container engine is available.
Step 3. Test the container locally
Before sending the image to the cloud, run it on your local machine. This confirms that your application runs correctly inside the container and responds on the expected port.
Step 4. Push the image to a registry
Next, upload your container image to a registry such as Docker Hub, GitHub Container Registry, or any private container repository. The registry acts as your storage and distribution system for deploying the image on remote servers.
Step 5. Deploy the container to your cloud
Finally, use a container-friendly hosting environment to run your image. This includes Kubernetes, AWS ECS, DigitalOcean App Platform, or any service that supports container-based deployments. These platforms handle container orchestration, health checks, scaling, and networking.
Docker-based deployment is more reliable than manual VM setup because it eliminates environment inconsistencies. However, it still requires infrastructure configuration such as clusters, load balancers, networking, and scaling rules.
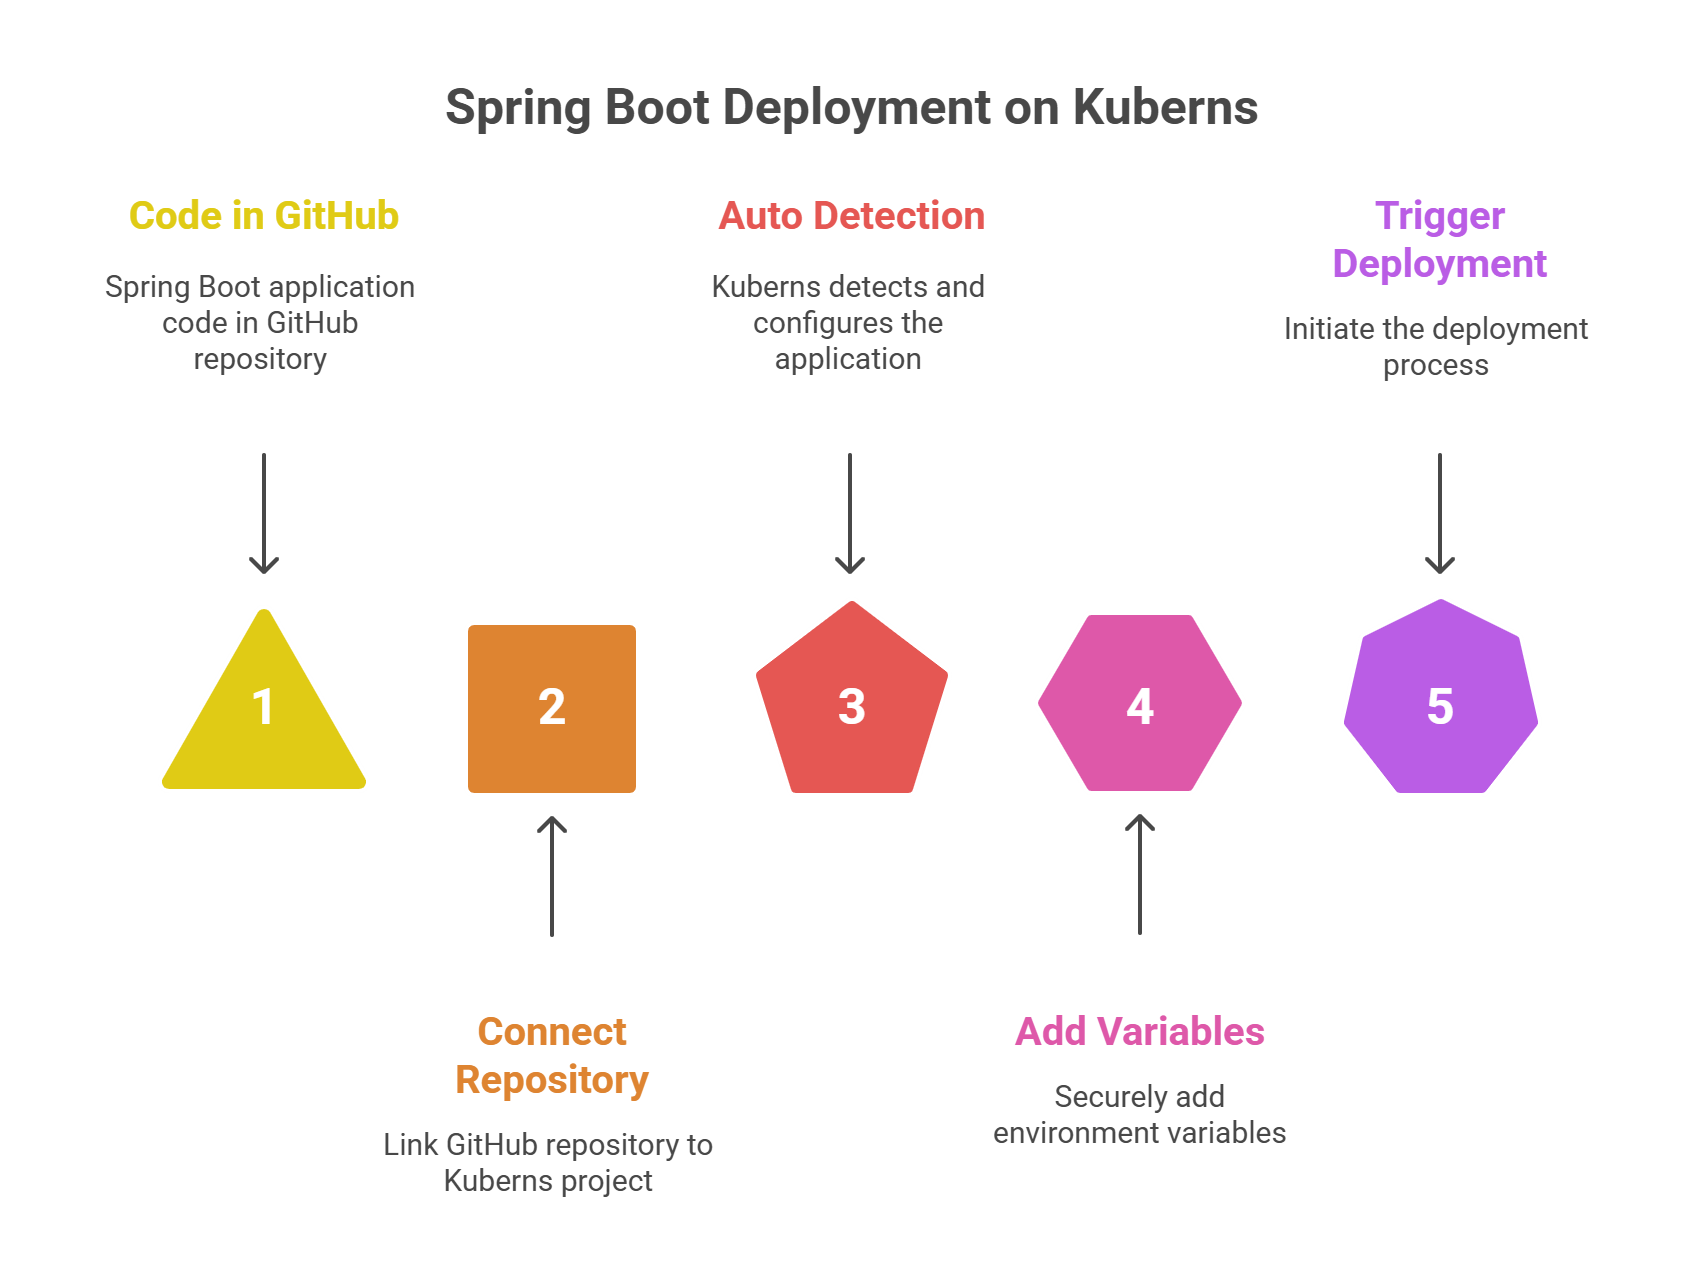
Method 3: Deploy Spring Boot on Kuberns
 The fastest and zero-configuration method
Deploying a Spring Boot application on Kuberns is the simplest option available today. Modern teams prefer this approach because it removes the need to manage servers, write Dockerfiles, or configure Kubernetes clusters. You focus only on your code, while the platform handles everything else. You can explore the platform at kuberns.
Step 1. Connect your GitHub repository
Create a new project on Kuberns and link your GitHub repository. The platform pulls your code directly from your chosen branch, setting the foundation for automated builds and deployments.
Step 2. Let Kuberns auto detect your app
Kuberns automatically identifies that your repository contains a Spring Boot application. It selects the correct Java version, installs all dependencies, builds the project, and configures the runtime environment. No manual setup and no custom scripts required.
Step 3. Add your environment variables
If your application needs database credentials, API keys, or service URLs, you can add them securely in the Environment section. Kuberns stores the variables in encrypted form and injects them only at runtime, which improves security.
Step 4. Click Deploy
Once you trigger a deployment, Kuberns builds your application, prepares a production-ready container, sets up networking, provisions resources, configures scaling, and enables logging automatically. Everything happens behind the scenes without you managing the infrastructure.
Step 5. Access your live application
After deployment is complete, you receive a secure public URL. Your Spring Boot app runs on Kuberns infrastructure with automatic scaling, health checks, continuous monitoring, and an average of 40% savings compared to AWS hosting directly.
Why Kuberns is the best choice for deploying Spring Boot applications
 Kuberns is built for modern teams that want fast deployments, predictable performance, and lower cloud costs without dealing with infrastructure complexity. It gives you a complete automated deployment pipeline for Spring Boot applications with zero configuration.
Zero setup and no configuration
You do not need a Dockerfile, server setup, or Kubernetes YAML. Kuberns detects your Spring Boot project automatically, builds it with the correct Java version, and prepares a production-ready environment in minutes.
Faster deployments with one click
Once you connect your GitHub repo, every push can trigger an automated deployment. This reduces release cycles and removes the friction of manually managing build steps.
Secure environment variable management
All sensitive values, such as database URLs and API keys, are stored securely and injected only at runtime. This keeps your application protected while making configuration updates simple.
Built-in scaling and health checks
Kuberns monitors your application and scales it based on demand. Automatic health checks ensure instances are restarted or replaced when needed. You get high availability without manual orchestration.
Deep observability with logs and metrics
You can view logs, deployment history, and performance metrics in one dashboard. This makes debugging easier and gives your team full visibility into the health of your Spring Boot app.
Significant cost savings
Kuberns runs on optimised AWS infrastructure and passes the savings directly to you. On average, teams save around 40% compared to running the same workload directly on AWS.
Ideal for both solo developers and teams
Whether you are shipping a small Spring Boot service or a multi-module enterprise application, Kuberns handles the deployment workflow reliably. Teams get faster shipping, and solo developers get an easier path to production.
Production checklist for Spring Boot
Before deploying your Spring Boot application to production, review the core operational requirements that keep your app secure, stable, and reliable.
Enable database backups
Make sure your database provider offers automated backups and point in time recovery. This protects your application from accidental data loss, failed releases, or corruption.
Use environment variables for sensitive values
Store credentials such as database URLs, API keys, and secrets as environment variables. This keeps them secure and allows easy updates without modifying the codebase.
Set JVM memory limits
Configure your JVM heap size and container memory limits. Proper memory allocation prevents out of memory errors and ensures your application runs efficiently under load.
Enable HTTPS
Always serve your production app over HTTPS. It protects user data and avoids security risks. Many hosting platforms provide automatic SSL certificates to simplify this step.
Configure logging and monitoring
Set up structured logs and connect them to a monitoring or observability tool. This helps you identify errors, track performance issues, and detect anomalies early.
Define resource limits
Specify CPU and memory limits so your app behaves consistently across environments. This prevents one instance from consuming excessive resources or affecting overall stability.
Enable health checks
Health checks allow your platform to detect unhealthy instances and replace or restart them automatically. This improves uptime and keeps the application responsive.
Final Thoughts
Spring Boot makes it easy to build powerful applications, and your deployment process should feel just as smooth. You can deploy on a virtual machine, use a container-based workflow, or rely on a fully automated platform that handles everything for you.
If your priority is speed, reliability, and minimal configuration, Kuberns gives you the fastest path from code to production. It manages builds, scaling, environment variables, monitoring, and helps you save significantly on infrastructure costs. You can explore the platform at Kuberns.
Whether you are a solo developer or a growing team, Kuberns offers a clean and dependable deployment experience so you can focus on building features instead of managing servers.
Ready to deploy your Spring Boot app in minutes?
Start your first deployment now on Kuberns

Frequently Asked Questions
How do I deploy a Spring Boot application to production?
You can deploy a Spring Boot app using a virtual machine, a container-based workflow like Docker, or an automated deployment platform. The best method depends on how much configuration you want to handle yourself. Platforms like Kuberns simplify this by building and deploying the app automatically from your GitHub repository.
What is the easiest way to deploy a Spring Boot application?
The easiest method is using an automated deployment service that detects your project, builds it, sets up the runtime, and deploys it without requiring manual steps. Kuberns is a good example because it does not require Dockerfiles, server setup, or Kubernetes configuration.
Can I deploy Spring Boot without Docker?
Yes. You can deploy directly using a JAR file on a virtual machine or upload your project to a platform that handles containerization for you. This is helpful for developers who want to avoid writing Dockerfiles or managing container runtimes.
How do I deploy Spring Boot on the cloud?
You can deploy Spring Boot on AWS, DigitalOcean, Google Cloud, or automated platforms. The workflow usually involves building your project, configuring Java, setting environment variables, and exposing the right port. Automated platforms reduce this to a single click.
How do I reduce deployment time for Spring Boot?
You can reduce deployment time by using incremental builds, automated pipelines, and platforms that provide pre-configured build environments. Automatic detection and caching significantly speed up deployments.
What is the best cloud platform for Spring Boot applications?
The best platform is one that offers fast builds, simple scaling, secure environment management, and low operational overhead. Many teams prefer managed platforms that remove server configuration completely.
How do I secure a Spring Boot app in production?
Use HTTPS, secure environment variables, enable CSRF protection if needed, and configure proper authentication. You should also store credentials outside your codebase and enable monitoring to detect issues early.
How do I scale a Spring Boot application?
You can scale vertically by increasing CPU and memory, or horizontally by running multiple instances behind a load balancer. Automated platforms handle scaling for you by monitoring traffic and resource usage.
Why is my Spring Boot app slow after deployment?
Slow performance can come from low memory allocation, inefficient database queries, missing indexes, or high-latency networking. Monitoring tools help identify bottlenecks quickly.
What port should I use for Spring Boot deployment?
By default, Spring Boot runs on port 8080, but you can change it based on your hosting or container setup. Many cloud platforms automatically handle port mapping for you.